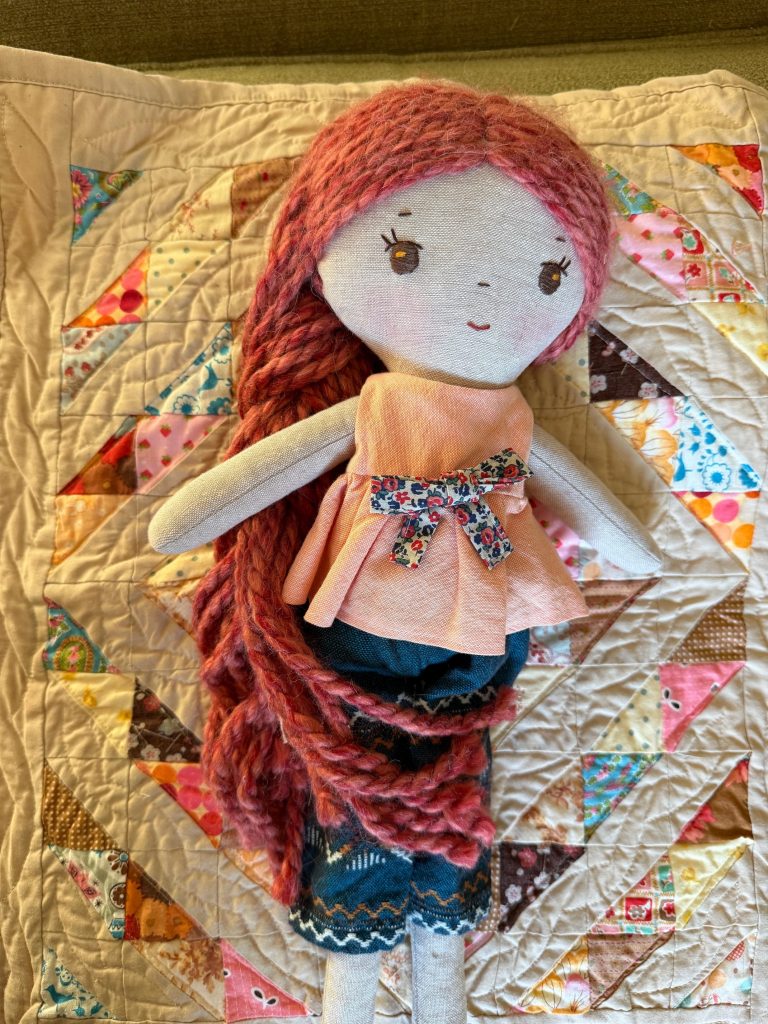
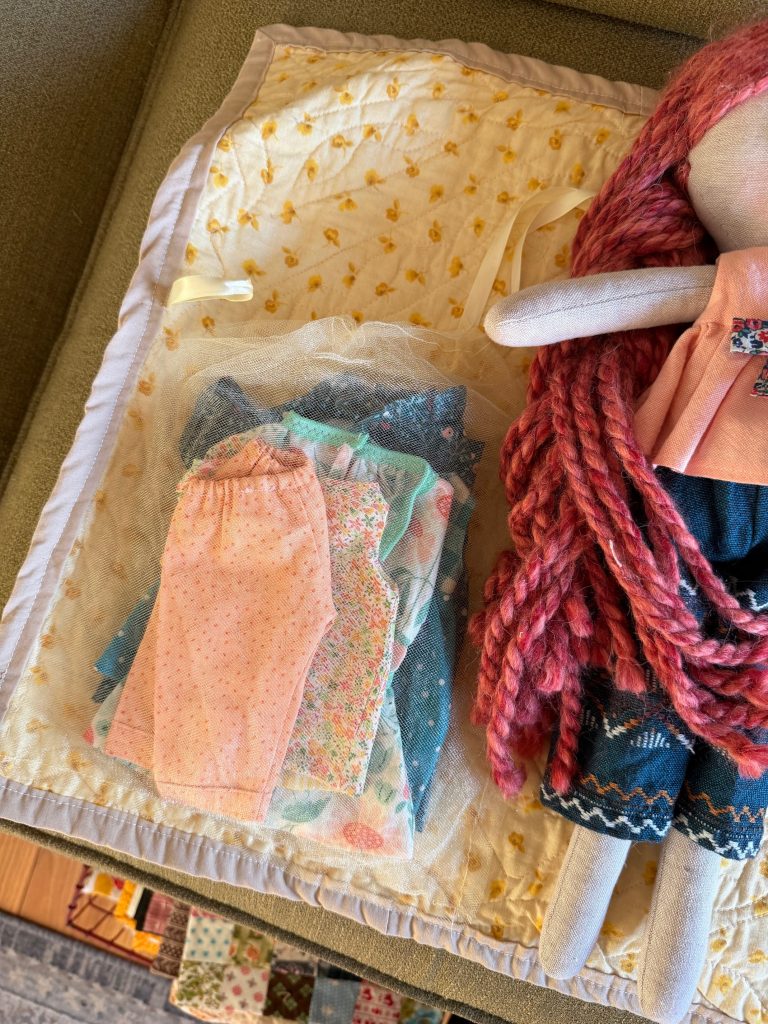
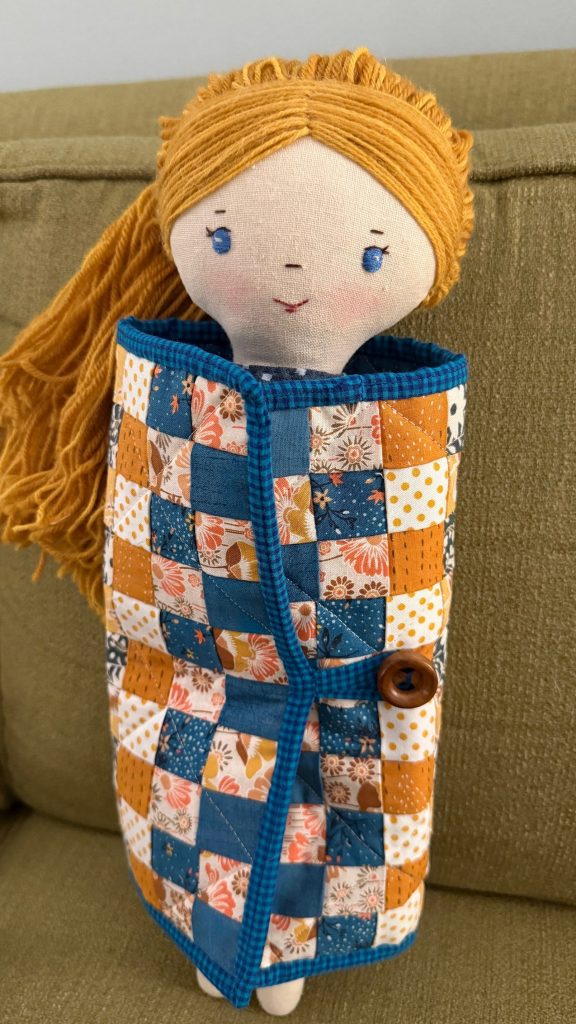
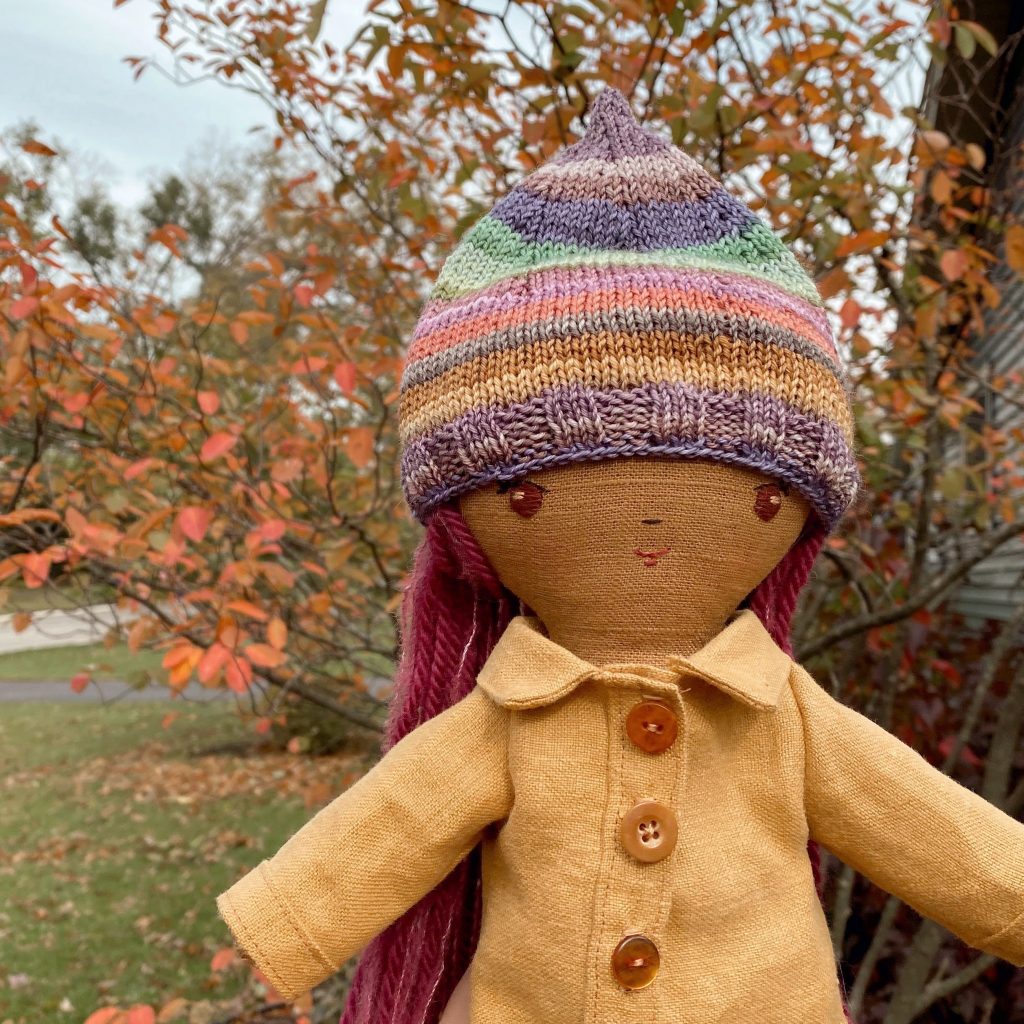
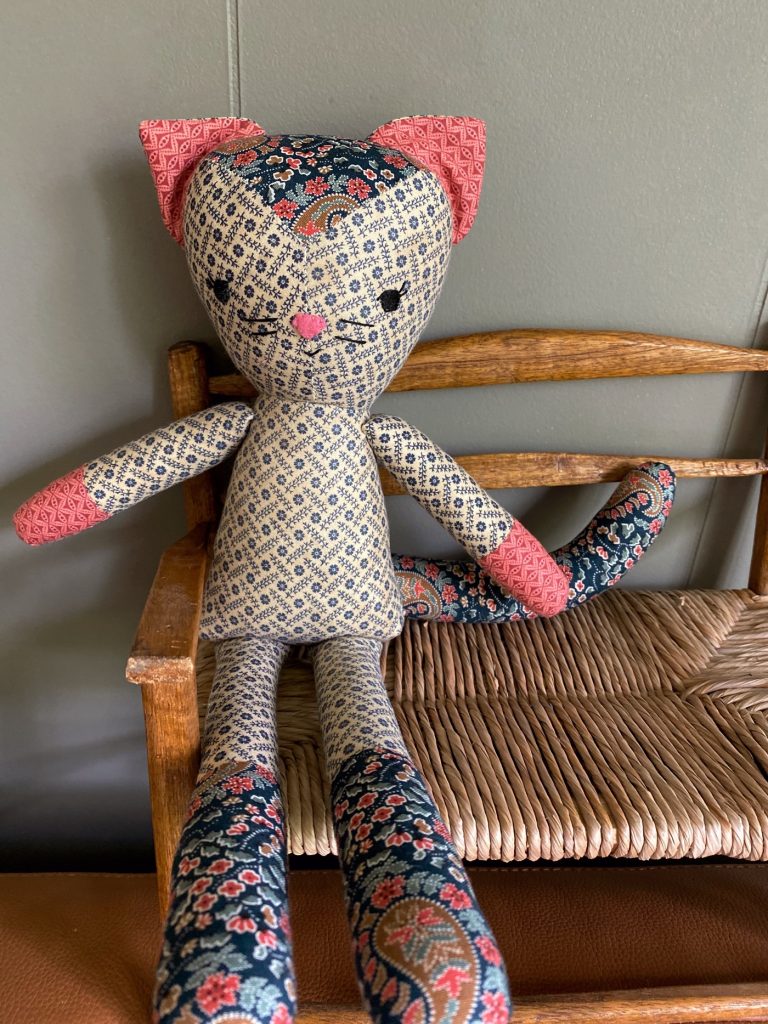
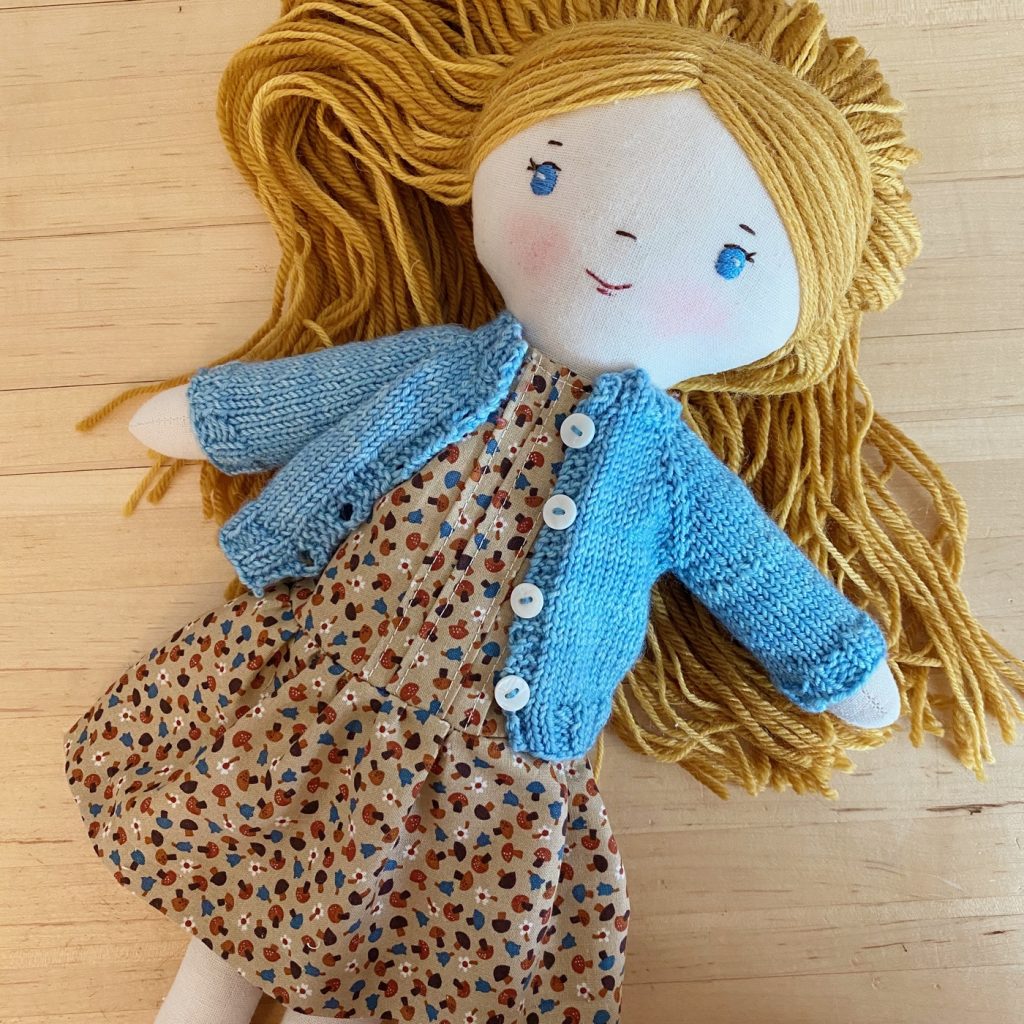
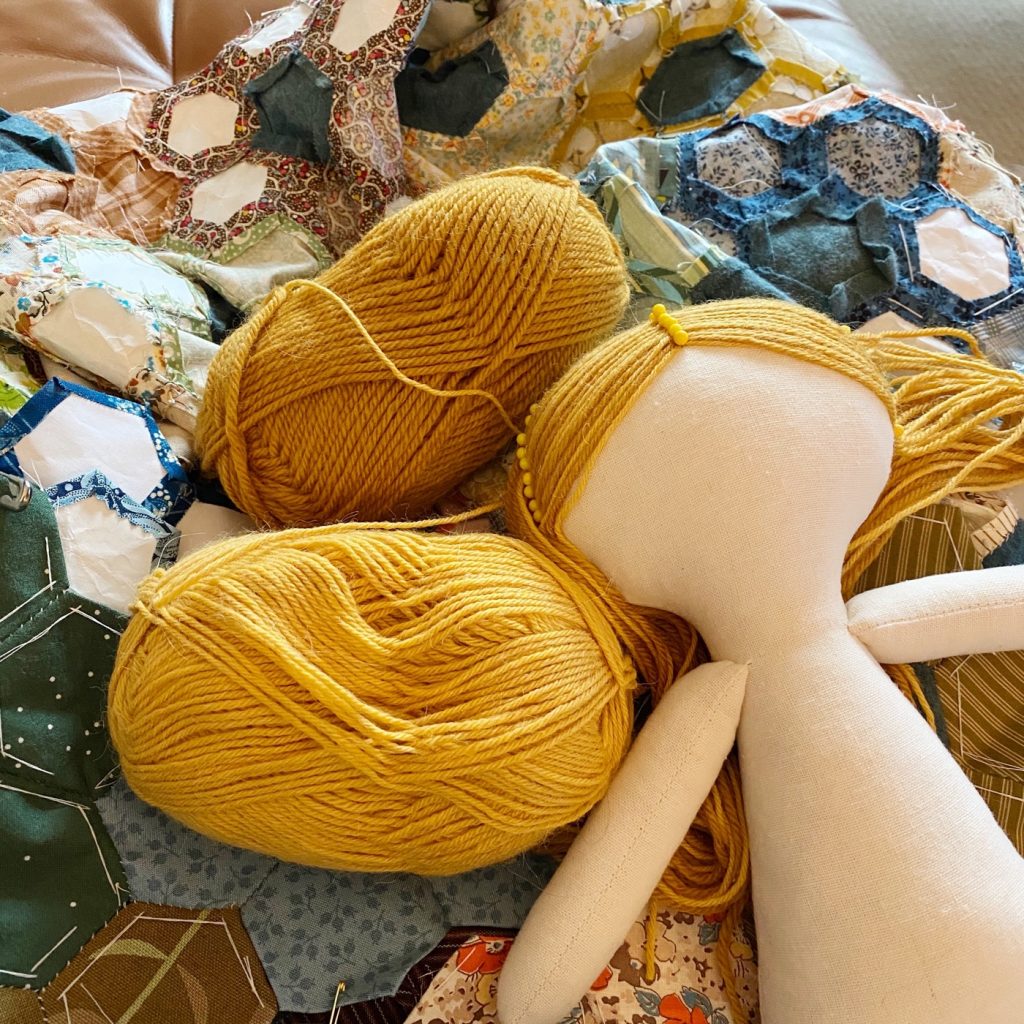
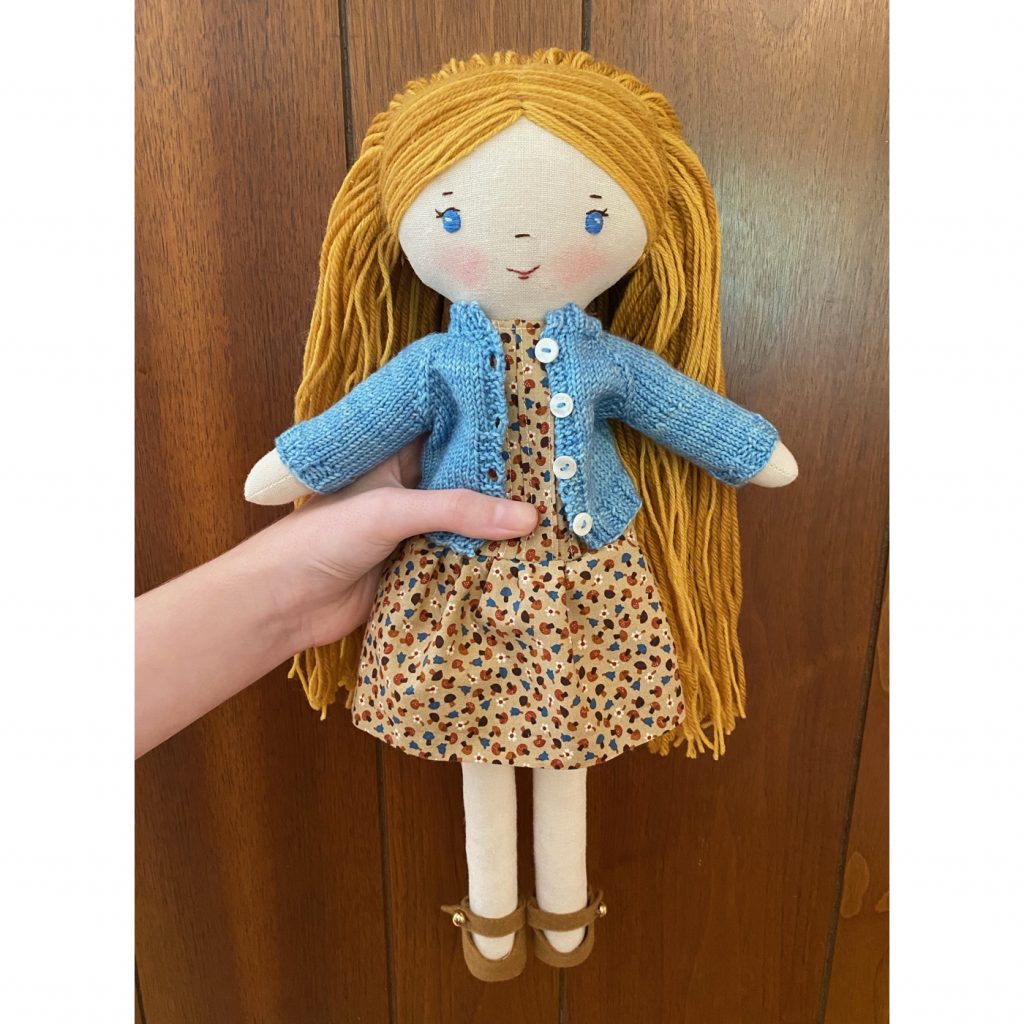
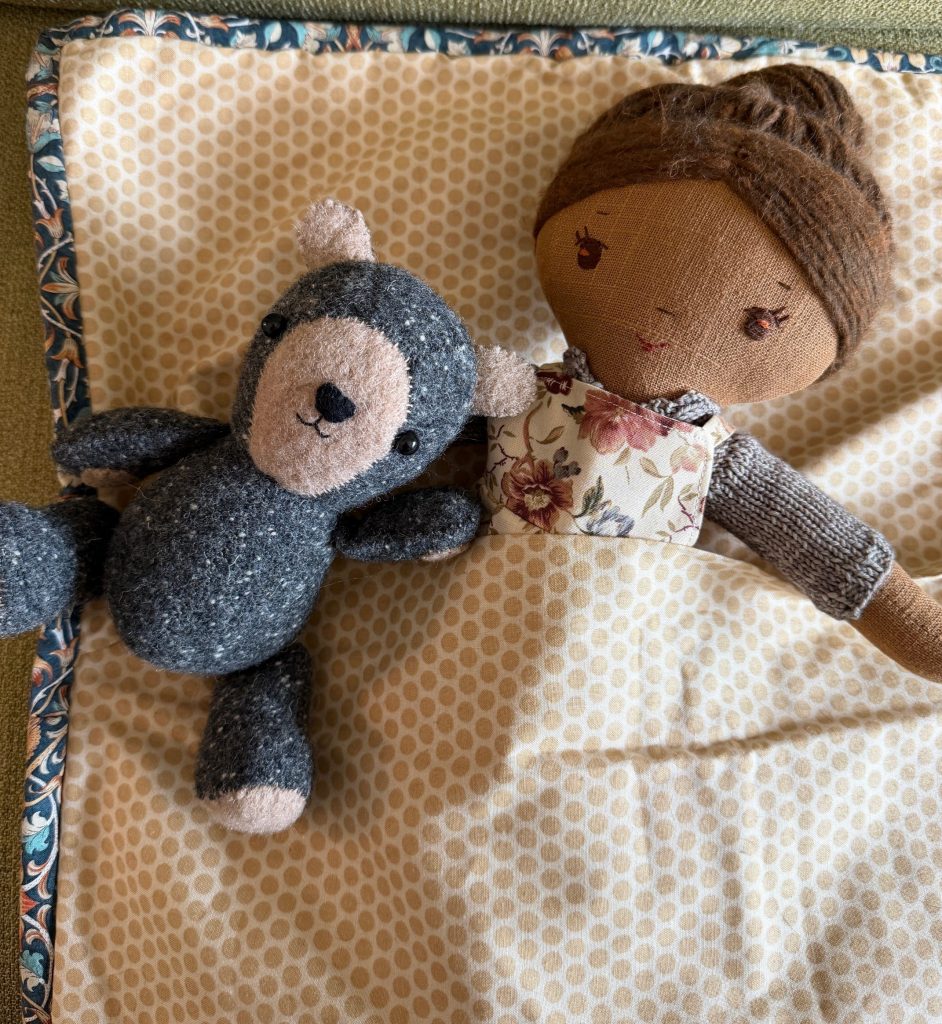
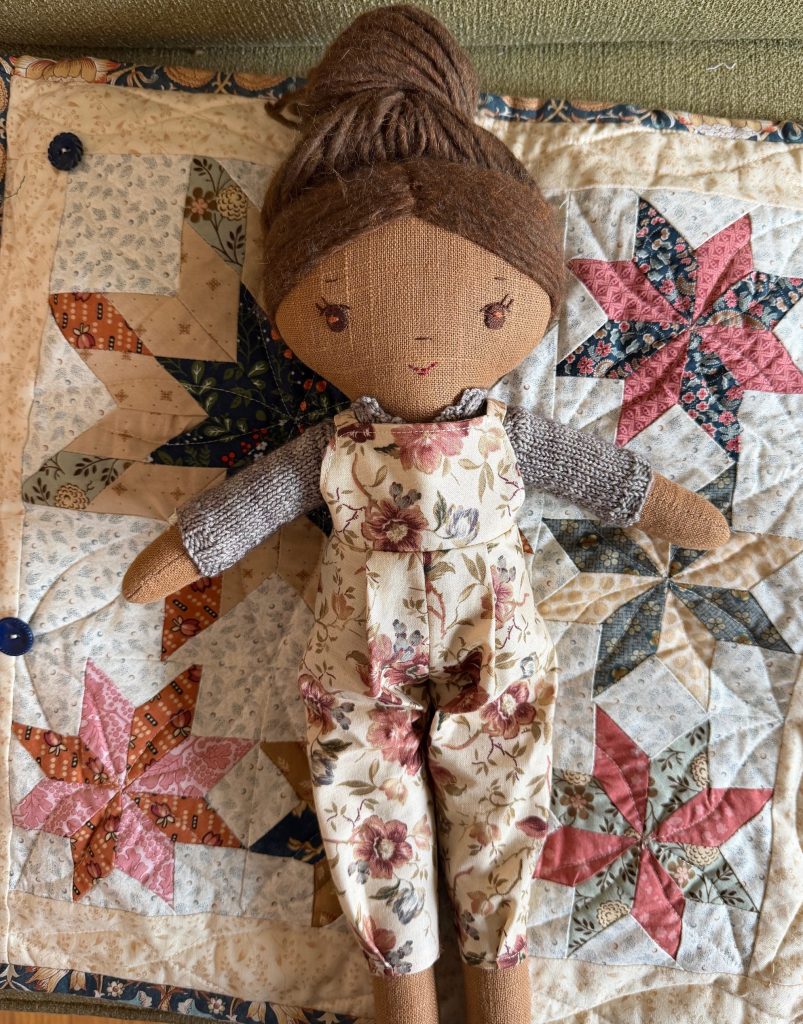
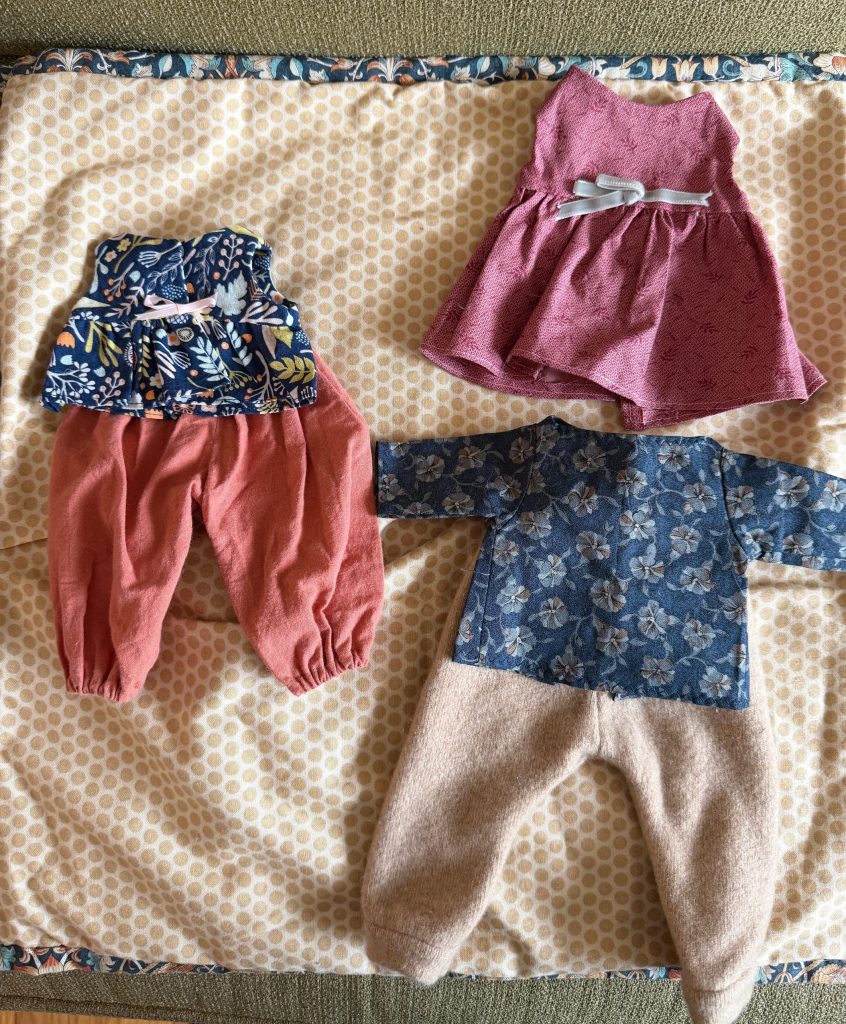
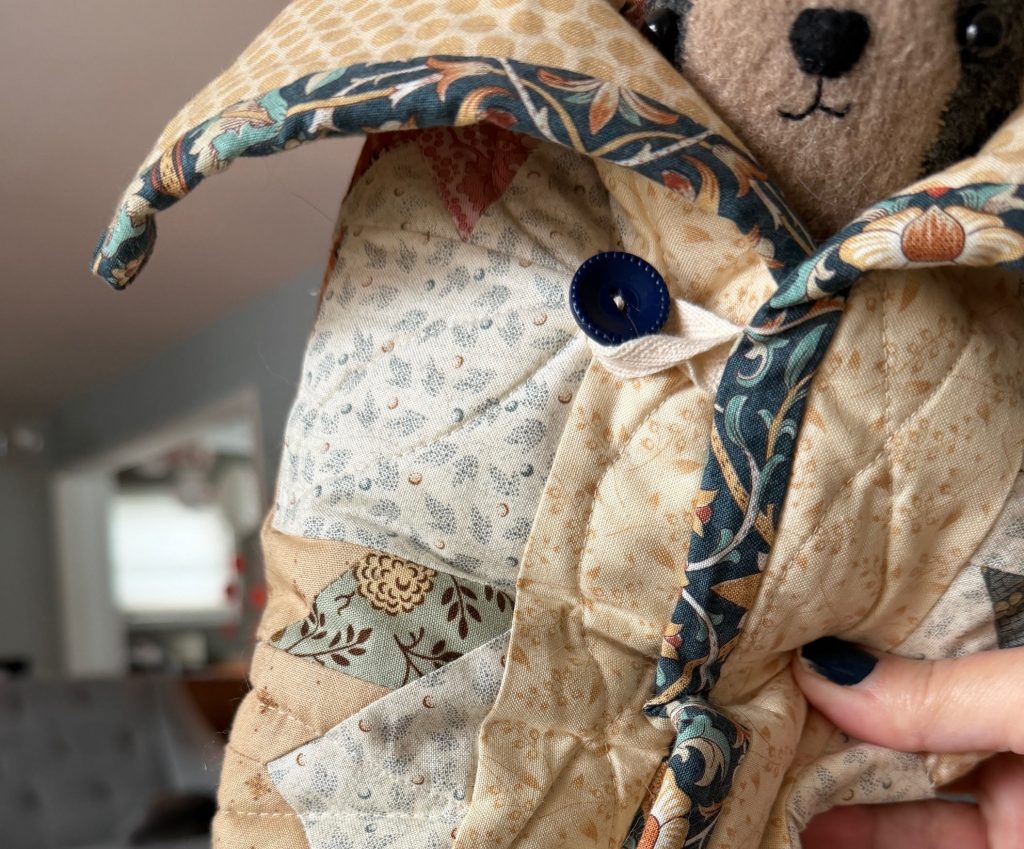
Posted on 3 Comments

Knit hat for Make-along doll

Gnome? my husband asked. Wizard? my daughter asked. No, just a cute pointy hat. Knit with this gorgeous sock yarn and size 2 DPNs.

Knit on sock yarn with size 2 DPNs.
Cast on 84 sts
Knit 7 rows of K3,P3 rib
Knit 16 rows
Start decreases. PM, K2tog, K12. repeat 6 times.
Knit 2 rows. (or just one if you don’t want your hat so tall)
Repeat decrease and knit rows until 12 sts remain.
K2tog 6 times (6 sts), K2tog 3 times (3 sts)
Cut yarn and tie off remaining sts. Weave in your ends.

Posted on 4 Comments

I made a quilt!

It’s been years and years since I’ve tackled a full sized quilt. I can’t really remember what sent me down this recent quilting rabbithole, I think mostly a need to get away from the doomscrolling. I bought two bundles from laundry basket quilts, scrappy light and dark and started playing around, piecing together some stars for pillow. Then I decided to take the rest and see what I could make. I landed on a flying geese pattern (wandering nomad) that I found on the art gallery fabrics site and started making blocks sort of haphazard. I realized a little late in the game I wanted it to ombre but was able to basically pull it off. Phoebe claimed it about halfway through the process and then helped me with block assembly. She cut and pressed for me as I sewed. So much fun to work on it together! So it turned out really great. It’s on her bed now and I’m so encouraged I’m jumping into another big quilt, for Christmas.

I did an angled grid quilting and I really liked how it dissected the blocks to make interesting new shapes. And it was very easy to follow and keep (basically) in line. It’s a little wavy but I think it’s great for doing it on a home machine. I’m hoping to get much better with practice at using my new machine (babylock jazz2) for quilting.
I love the fabric I chose for the backing, Patchwork Tulip by Sarah Golden. It was in my scrappy bundle and I have it on the front in some blocks. I love her whole Perennial fabric line. For the binding I tried something new. I machine sewed it instead of sewing it by hand on the back. It was an experiment and I was really surprised with how well it turned out! I followed this tutorial and sewed it to the front then pressed and glued it in the back to prep it. Then I sewed in the ditch on the front catching it on the back. Again, really surprised how well it worked, the glue was the magic touch. I enjoy hand sewing on bindings but really wanted a finished project and didn’t want to get stuck up on anything so I went for it.
Posted on 2 Comments

Patchwork Kit-Kat

I made a new Kit-Kat doll from my Make-Along Animals pattern and did a little tik-tok video while I did it. Which is a little harder to do now that Phoebe has abandoned me for school. Since I’m having all the quilty feels these days I decided to make a sort of patchwork version of Kit-Kat. Kitty is made up of 3 fabrics. Normally I do a solid for the body, a print for the head gusset and another solid for the ears. This time I did all prints, one for main body, another for gusset, tips of feet and tail and a third for ears and paws. I love how she turned out. I still need to make her a little dress or overalls but honestly she works as she is and I may just put her out on the sofa with my new patchwork pillows. I’ve always wanted to do the dolls as decor not just playthings because we don’t always have little ones to sew for and that shouldn’t stop us from sewing ourselves cute new friends.

To patchwork the arms and legs I cut the pattern pieces where I wanted the split and added 1/4″ at the ends and then cut out the fabric from the new pieces. For the legs the back and front both have the new print for the paw but for the arms I did the pink print just on the front and the back arm pieces are still all the body print.
sewing on her ear you can see the back of the ear fabric is same as body fabric.
Posted on 4 Comments

two tone blond make-along doll

Any yarn can be used to make hair for a handmade cloth doll like the Make-Along dolls… bulky, dk, sport… wool, acrylic, roving, mohair. Whatever you like to achieve the look you’re going for. It’s also fun to use a few different yarns together. Here I used two very similar shades of a golden yellow and it gives her a great full head of sunny blonde hair.

For this doll I pulled the yarn from both balls at the same time and strung them together. For this weight of yarn, dk, I would probably do two strands at the same time even if using just one yarn so that it would take less passes to get the fuller look. Complete instructions on how to do yarn hair are included in the Make-Along doll sewing pattern.

Posted on 2 Comments

Experiments in natural dyeing for doll clothes

I like my crafting experiments to be low risk. Dying fabric with natural ingredients fits that bill. I’m not going to accidentally stain my counters, no gloves needed, I can use my regular cookware for most of it. And I don’t need dramatic results or for my fabric to be colorfast. I never wash doll clothes because my samples are not getting played with and if it fades thats ok. There’s really no risk of the dyed fabric coming off on my cloth doll bodies, so far. So I love it! It’s fun and random (the way I’m doing it) and very pioneery which I love.

So far I’ve tried dried marigolds and avocado pit. This is the dried marigolds below simmering in the pot. I dyed a bath of fabric but didn’t love the results, too just tan so I dyed them again. I used less heat, kept it on super low and I pretreated the fabric by soaking it in aluminum acetate to be the mordant and wow, that brought the yellow. (before pic is below and after pic is at top) I also did a piece of Monaco cross stitch fabric and a piece of white wool (no mordant) and they came out a really pretty light yellow. The prints and the linen top came out dark yellow and I really like the result. Except on that plaid, it was a bust.

Dying with an avocado pit was super easy and I have no idea what I did, other than leave it soaking/simmering for hours. I used this vintage floral fabric and it turned a lovely light warm pink.

I made this sweet dress for Chloe from the fabric. I also dyed some Monaco with the avocado and love how it turned out as well.

Next I’m going to try onion skins and then madder root. If you have any other suggestions I’d love to hear them. Or a good book on the subject?

Posted on 6 Comments

New! Chloe and Louise Pattern Redesign

Kit, Chloe and Louise are refreshed and ready to go for 2020. I made this pattern back in 2008 and I’ve always loved these spunky girls. They were originally offered as a printed pattern booklet and I had a bio questionnaire listed for each of them on the cover. My favorite question was what WB heroine do you most relate with, Louise’s was Rory Gilmore, Chloe’s Veronica Mars and Kit’s was Buffy! 😂They were aged 9-10 and were sort of my spin on a current day, handmade American Girl type doll. The Make-Along dolls fit better in that spot now so for the redesign I’ve reimagined Kit, Chloe and Louise as younger girls, 5-6 and made them a new wardrobe of super cute little girls fashions. The have a new body shape that is a little more squishy and huggable and have more of a waldorf baby doll vibe going.

I hope you like them. I’m crying inside a little that Phoebe is nearly a teen and I can’t tuck them in under the blankets with her, but I’m so happy to be sending these cuties out into the world. I just love the new outfits. Again, crying a little when I see cute little girl clothes that I have no reason to buy so I channeled that into these new additions. I think my favorite is the playsuit.

Or maybe the pinafore! Shoot I like them all. The gingham top is modeled after a top I made Phoebe when she was a toddler. As is Chloe’s hair 🥰

Posted on 8 Comments

Body fabric for Kit, Chloe and Louise dolls

I love to make my Kit, Chloe and Louise dolls squishy and soft. I think of them as my baby dolls. They’re chubby and toddler like with wide cheerful faces and they give great hugs. The stiffer, more tightly woven your fabric is the less it will give and it will give more structure to your shapes. And that will totally work for this doll design too. It will make the dolls a little easier to dress and a little less squishy. I’ve found this fabric is great if you want to give your doll a little more squish. It’s from Joanns and it’s called Sew Classics Linen Like Hopsack fabric. It is 55% linen ad 45% rayon. It has a textured nubby appearance which I love. It stuffs really easily, I never have any lumps. (Here’s a link in my amazon shop to stuffing I use.)

The keyword in that fabric name is Hopsack. They have other fabric in the Linen & Linen Look collection that are 100% linen, not the blends and those would still be great for doll bodies but is not the fabric I’m using here.

Potting Soil on right, Natural in middle, Papyrus on right

So what I’ve sussed out is that it is pretty much always available, at least in last couple years, but they have different colors available. So right now they have Papyrus (sort of a neutral tan), Natural (very light ivory) and Potting Soil (dark brown). The dolls above are Natural and a brown that they don’t have in the store right now, maybe it was called Nutmeg?? It is lighter than the Potting Soil. I will update post when I see it back in the store. If anyone sees anything different at their Joanns let me know in the comments.

Hope this is helpful! Let me know below if you have any questions.