Filed under things I didn’t know I needed but are absolutely essential: project bags for cross stitch. I have, for years, had one small tote bag with all my cross stitch stuff in it – a few patterns, small hoops and some pieces of linen. Recently Phoebe and I both got started on projects and it became clear we outgrew sharing the one cross stitch bag, so project bags! Project bags seem like they can get pretty fancy with handles and quilted backs but I just took the key parts, zippers and a vinyl front. Mine are super basic but for me, keeping them simple makes them fun to make and I can whip them out for each new project. And they are doing the trick! I love how tidy and organized it is to have everything in one place.
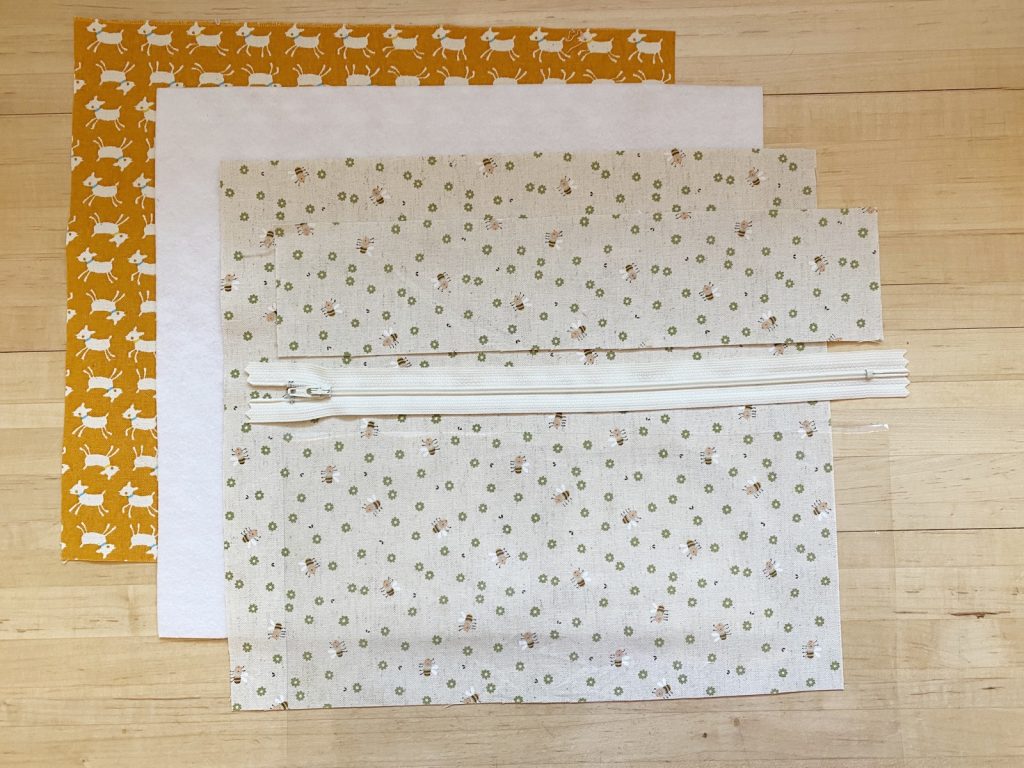
Here’s how I made mine. Supplies: to keep them sturdy and not floppy I use stiff interfacing (Peltex 70 Ultra Firm Stabilizer, or whatever they have at the fabric store that seems like stiff craft felt), vinyl which is sold by the yard on a roll over with the home decorating fabrics, fabric for the binding (or you could use premade binding), fabric for the back and the front (I used canvas fabric to make it more heavy duty and a zipper (this one is a 12″ and I used 14″ on the other bags I made). Your bag needs to be wide enough to fit your printed pattern in, so making it at least letter size is a safe bet. This project bag is 12.5″ wide by 10.5″ tall.

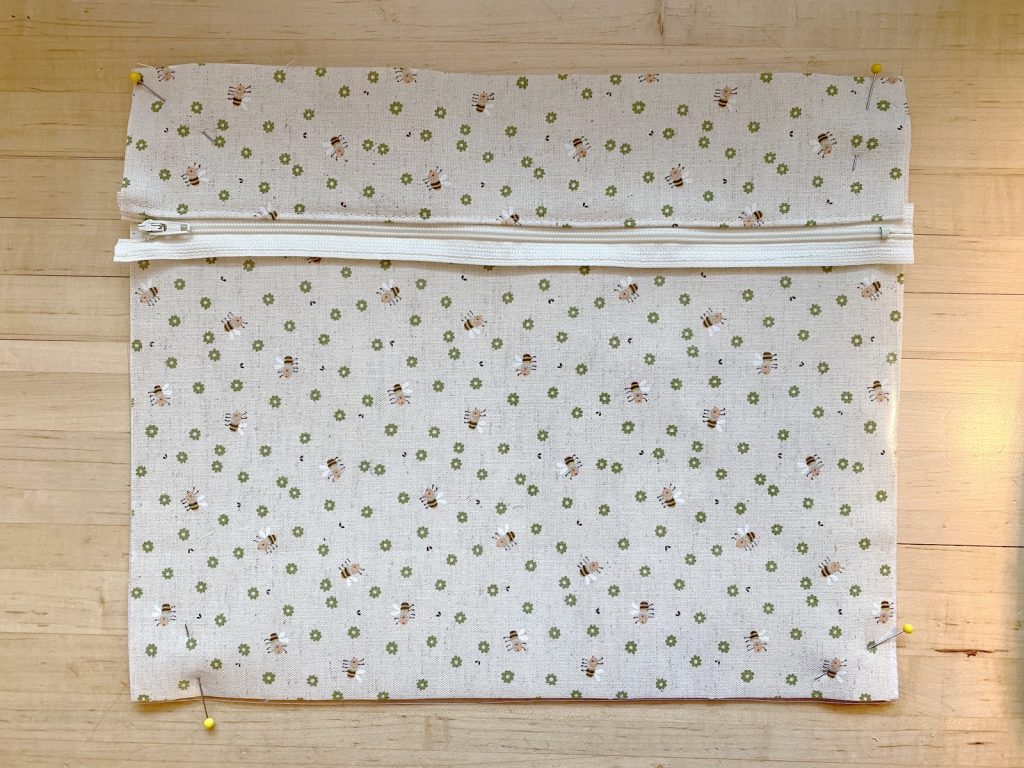
Cut the interfacing and the two prints to the full size, 12.5″ wide by 10.5″ tall. Cut another piece of the front fabric to be above the zipper the same width 12.5″ and then however tall you want it, mine is about 3″. Cut the vinyl to same width and then whatever height is left so I cut mine 12.5″ wide by 8″ leaving extra height that will be trimmed off when I sandwich it all up.
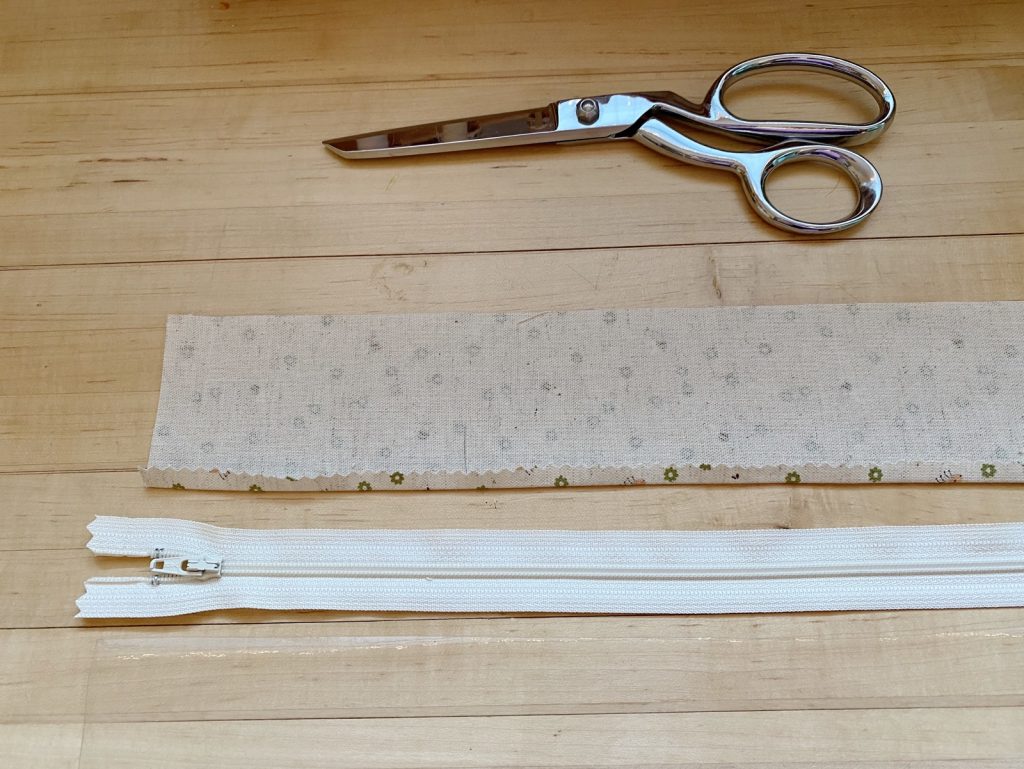
Pink one edge of the top piece press under 1/4″ seam and then sew down on top edge of zipper.
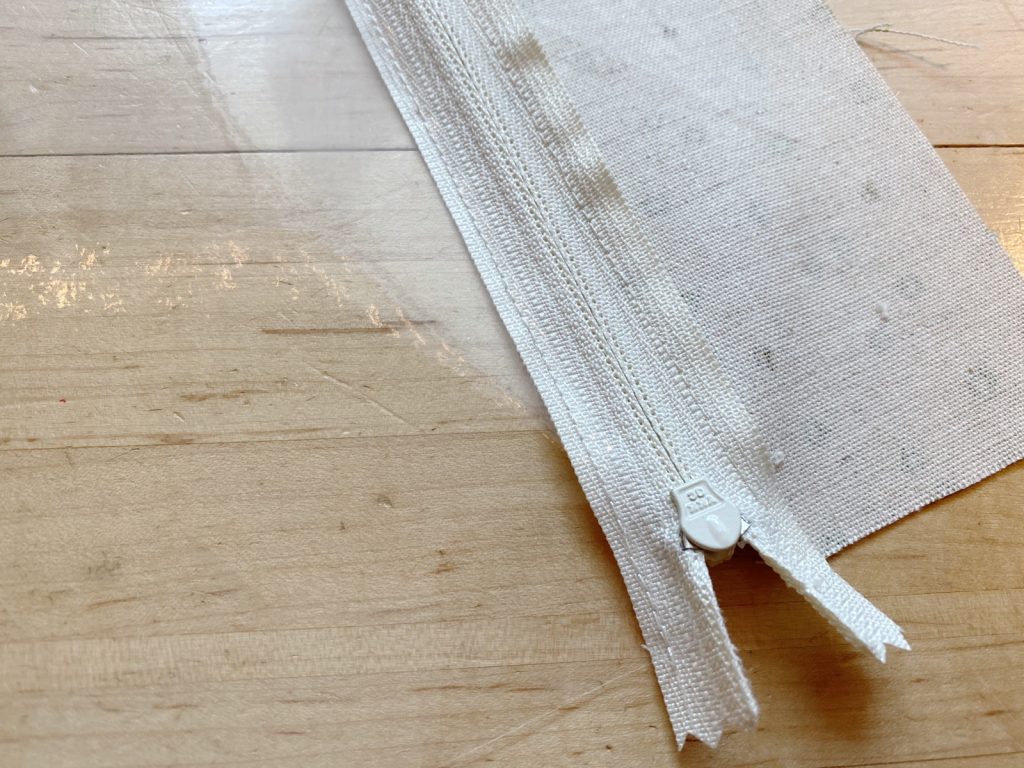
And sew the vinyl to the bottom edge of the zipper. I just lay the zipper over the vinyl and sew it in place. So on my front the bottom edge of the zipper fabric is just laying there exposed. This doesn’t bother me but if you’d like to add another strip of fabric to the bottom of the zipper and then sew the vinyl to that fabric you’ll have a more finished look.
Here are the pieces all sandwiched: orange lamb fabric is on the bottom, right side facing down, then the interfacing, then the full sized bee fabric piece with right side facing up, then the top piece with the vinyl and the zipper. I pin it all together and trim the zipper edges and any overlapping vinyl.
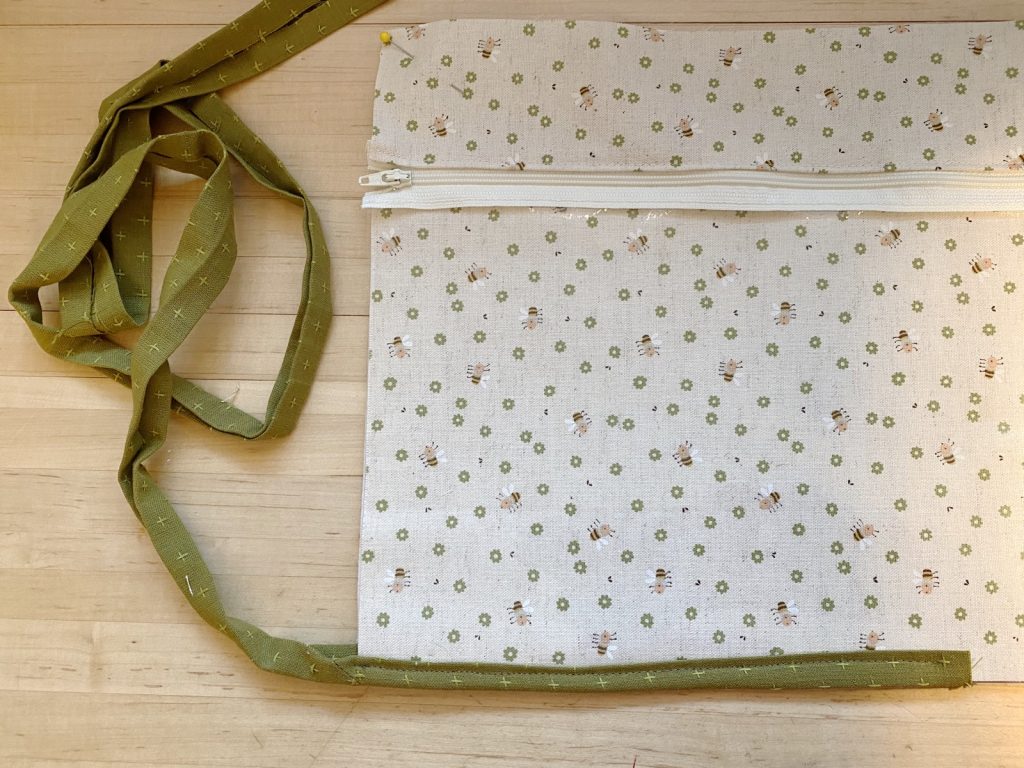
Finally, sew your binding around the edges. Which can be tricky to do. The bit in this photo I actually tore out and redid after it was all done because it was bugging me that it shifted. I always hand sewn my binding on quilts because I hate the shifting. It’s real hard to hand sew binding through this interfacing and we want it to be quick and fun so I just do it with the machine and honestly I don’t notice the flubs when I’m using it, only in the photos.😝
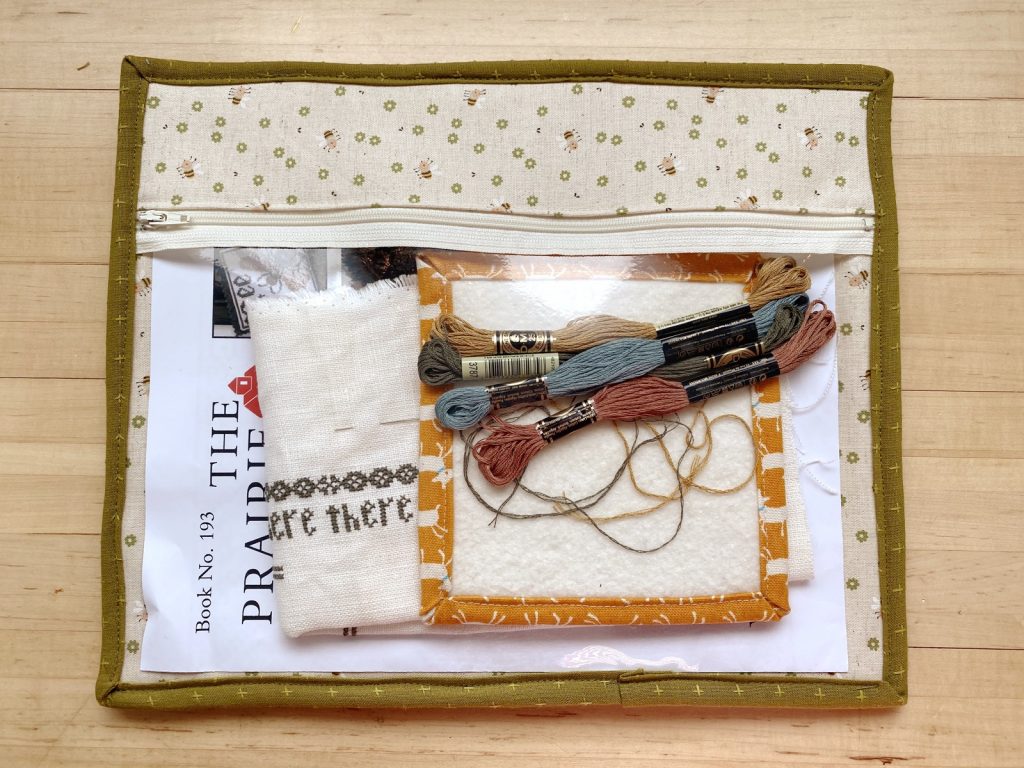
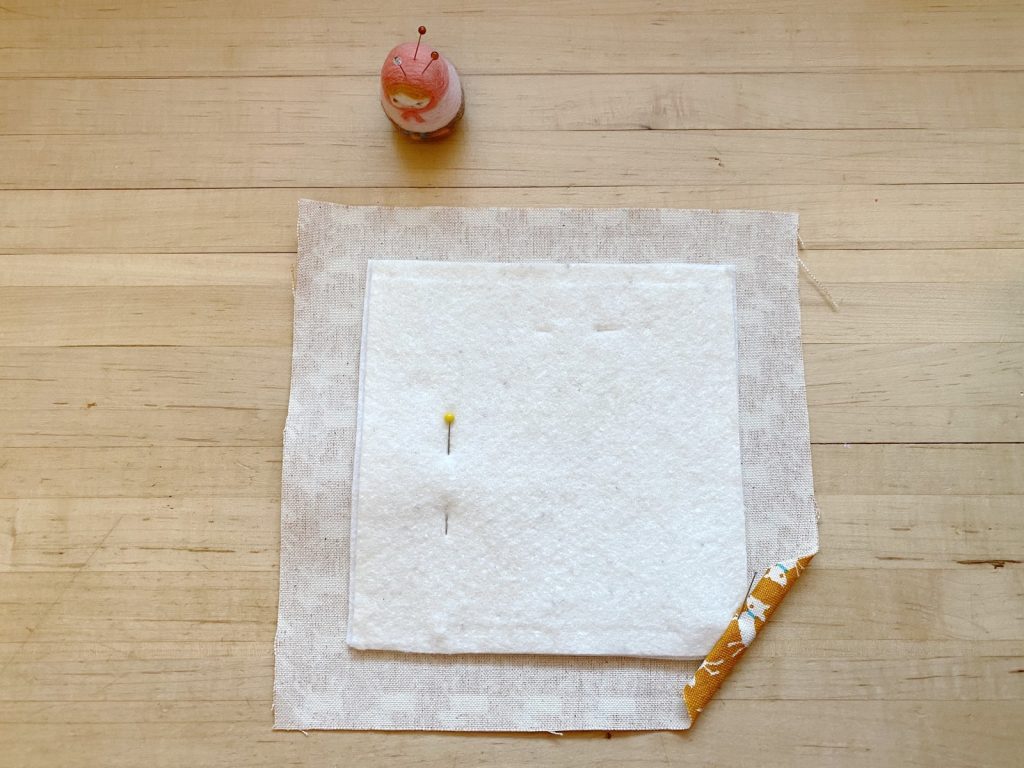
Inside the project bag I like to put a little design board to catch the cut floss pieces I’m working with. This is another thing I discovered on flosstube. So design boards are used for holding quilt pieces while you work on designing and they’re being repurposed here. Here’s a tutorial with Lori Holt that I watched on how to make them. For mine I just wanted a tiny one to fit in my bag. I used 5″ x 5″ pieces of the heavy duty interfacing and cotton batting and then a larger 6″ x 6″ piece of fabric. Instead of separate binding to finish it, I folded under the edges all around and then over on top of the batting and sewed it down. The batting is on top and the pieces of floss stick to it.
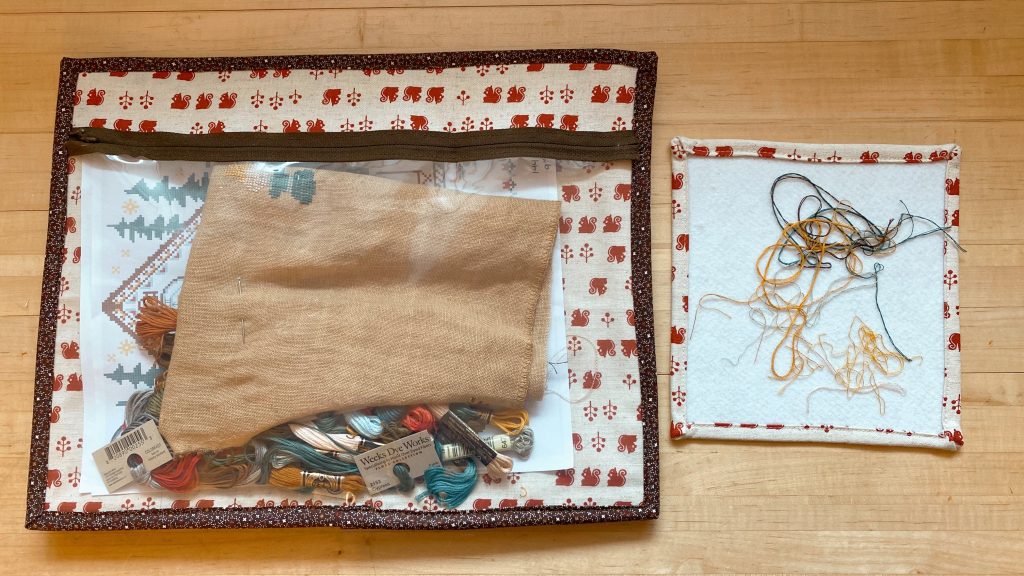
And then that’s it. You put your linen, your pattern, floss, needle, floss minder in there and you’re all set to get stitching. I can see how this may lead to addictive overbuying of patterns for me. Right now we have 3 bags. Phoebe is working on a Gera design, I am working on this cute cute cute bee design 🐝and then I’m also starting on my redesign of the Storybook Girls pattern. And I have the materials coming for a design I’m going to make for my mom. It seems from watching floss tube that what the cross stitchers do is have a bunch of projects going at once so they can keep things fresh, not get too bogged down on one project, move on and keep the interest going. Not a bad idea! And of course if it leads to more planning and making, that’s a bonus. Craft prep can be as much fun as the making.

Some links: Here’s is the Fat Quarter Shop flosstube and the Real Housewives of Stitching flosstube and there are a bazillion more, just type flosstube into youtube and off you’ll go.
Love this! Questions – what gauge of vinyl do you use?
Not sure there were options at Joanns where I got it. It’s not super thick.
Instead of using interfacing, could I replace it with felt?
I think that would be too floppy but if you didn’t care about that it’d be fine.
Could I replace the vinyl with some kind of mesh fabric too?