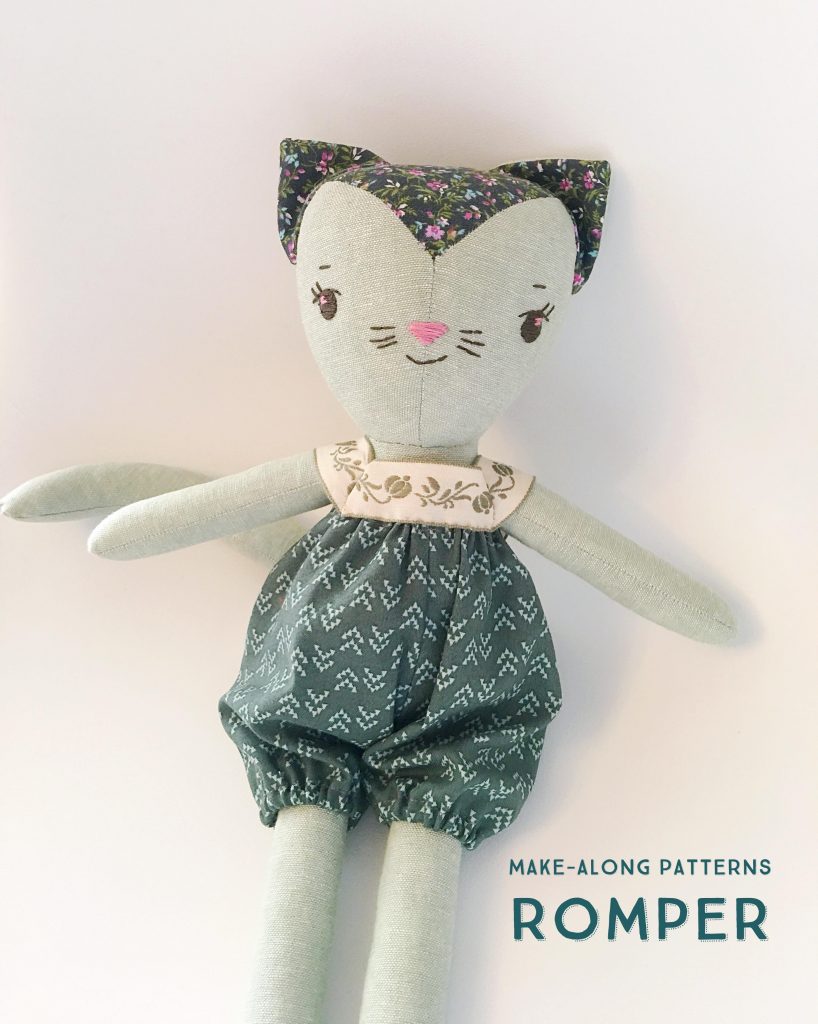
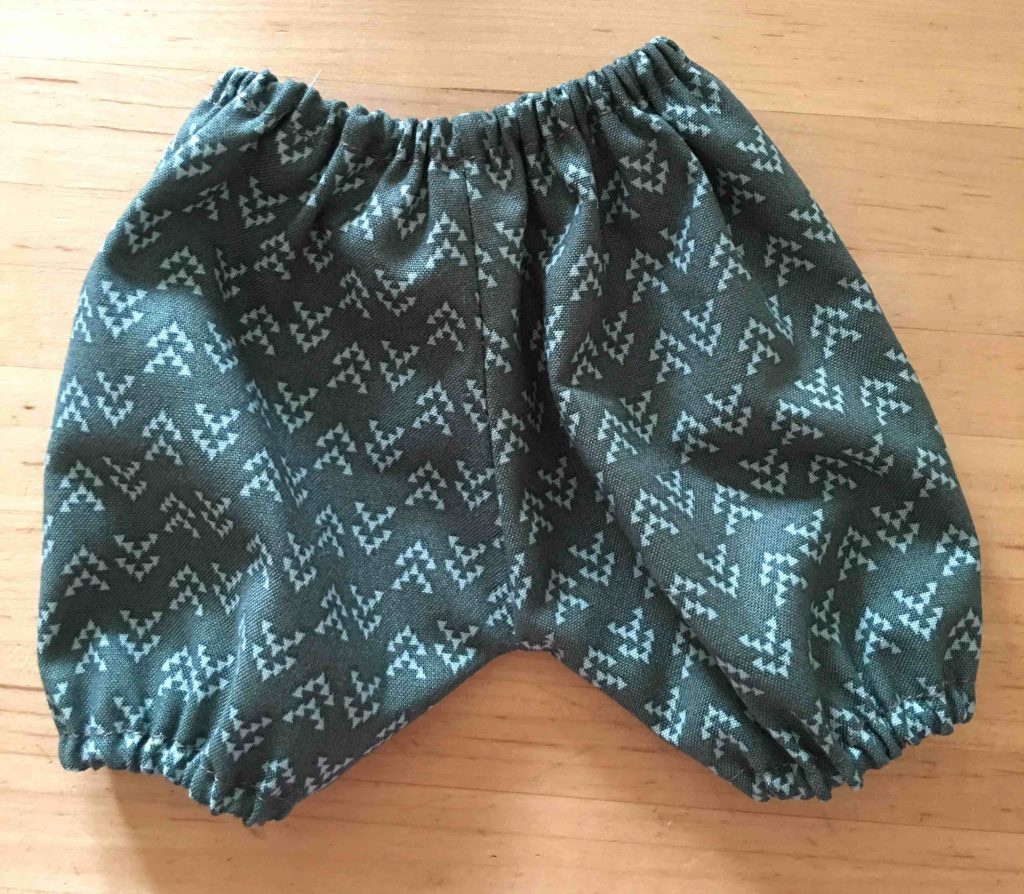
This romper pattern delivers a lot of cute for not so much effort. (Another easy go-to pattern to get your doll dressed in a hurry is the Apron dress pattern) This romper has elastic cuffs and waist, an opening in the back for a tail and a bodice with sleeves easily made from a woven ribbon. The materials you’ll need are 20″ x 8″ of fabric, 10″ of 1/8″ wide elastic, 11″ of ribbon (ribbon should be between 1/2″ and 1″ wide). Print out your pattern piece here and we’re ready to get started.
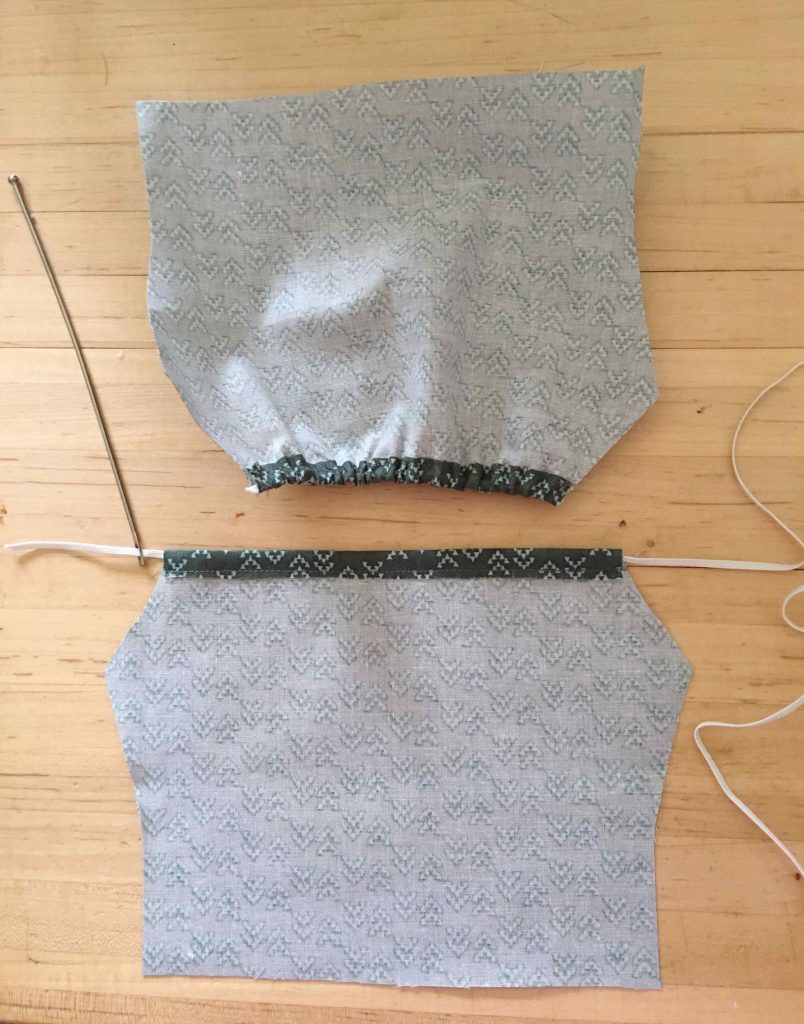
Step 1: Cut 2 on fold of Romper pattern piece A. Press under 1/2″ along straight cuff edges and sew at 1/4″ to create casing for the elastic. Thread through elastic and secure one end by sewing across the casing, catching the elastic in place. Pull elastic taut so that the leg gathers as much as you’d like it around your doll’s leg and then sew elastic in place. Repeat with other piece.
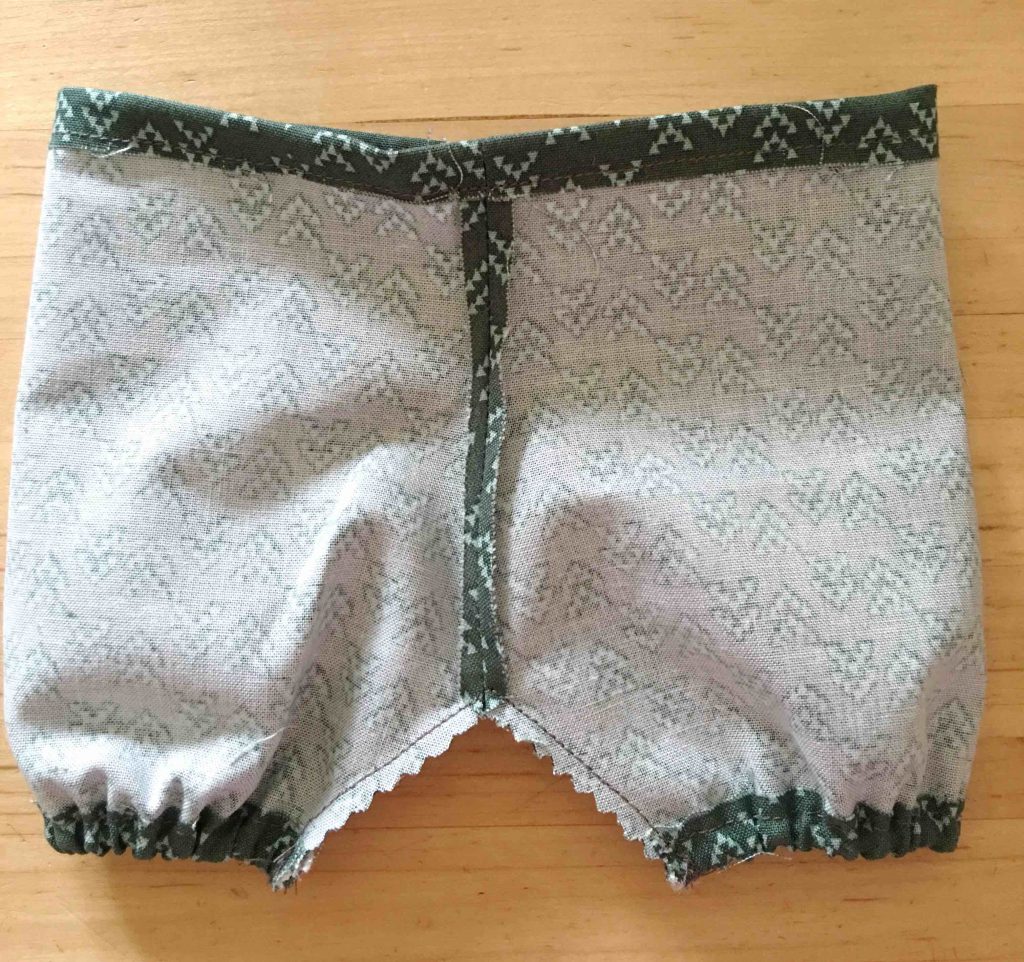
Step 2: With right sides together sew romper pieces at center seams, with one seam sewn up completely and the other from the bottom to the dot. This will be the back and we’re stopping early to leave room for our bunny, kitty, deer tails. If you’re making for a doll you can sew all the way up. Press seams open.
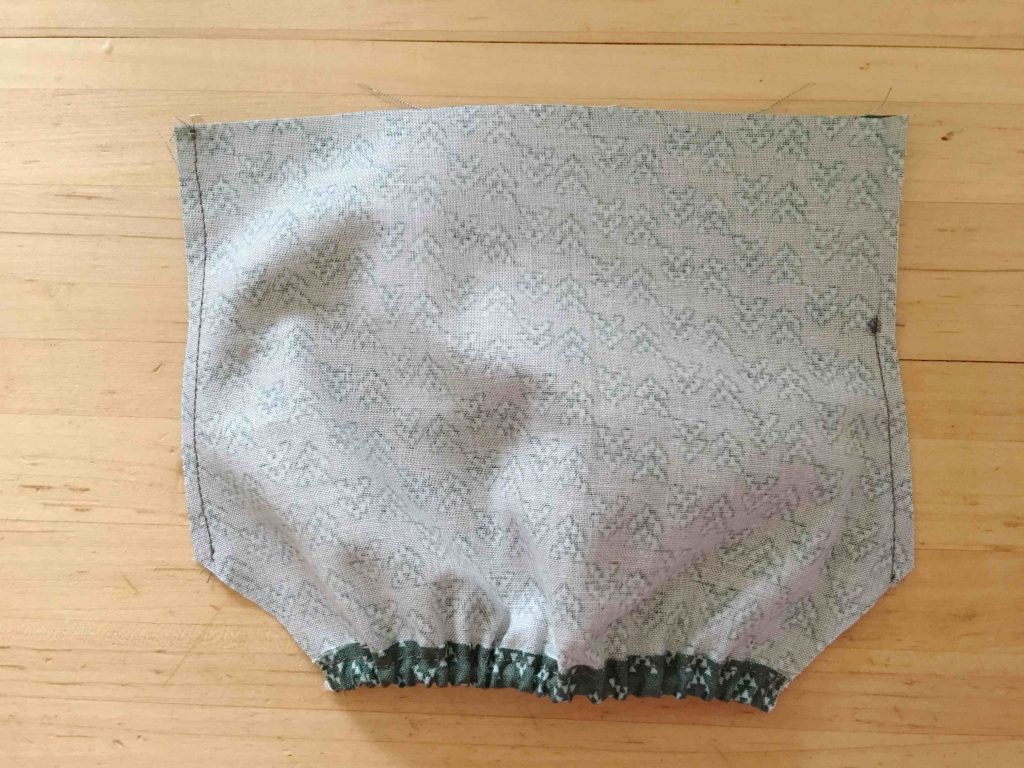
Step 3: With right sides together sew romper front and back together along under leg seam. Clip curves. Press under and sew a casing along top edge same as you did for cuffs. If you’ve sewn back all the way up for a doll: Leave a 1/2″ gap in casing to thread elastic through. Thread elastic through, pull taut, cut off and sew edges together. Sew gap closed. If you’ve left back open for a tail just thread elastic through as you did for the cuffs. And then for finishing, topstitch the pressed open seams along back opening.
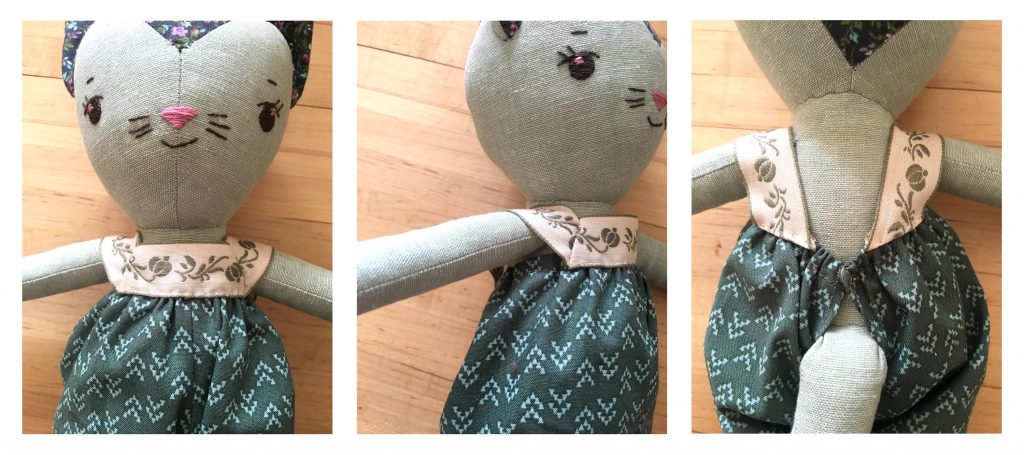
Now you’ll have your romper bottom ready for its ribbon bodice. The romper should fit your doll with the top elastic edge around the doll’s chest.
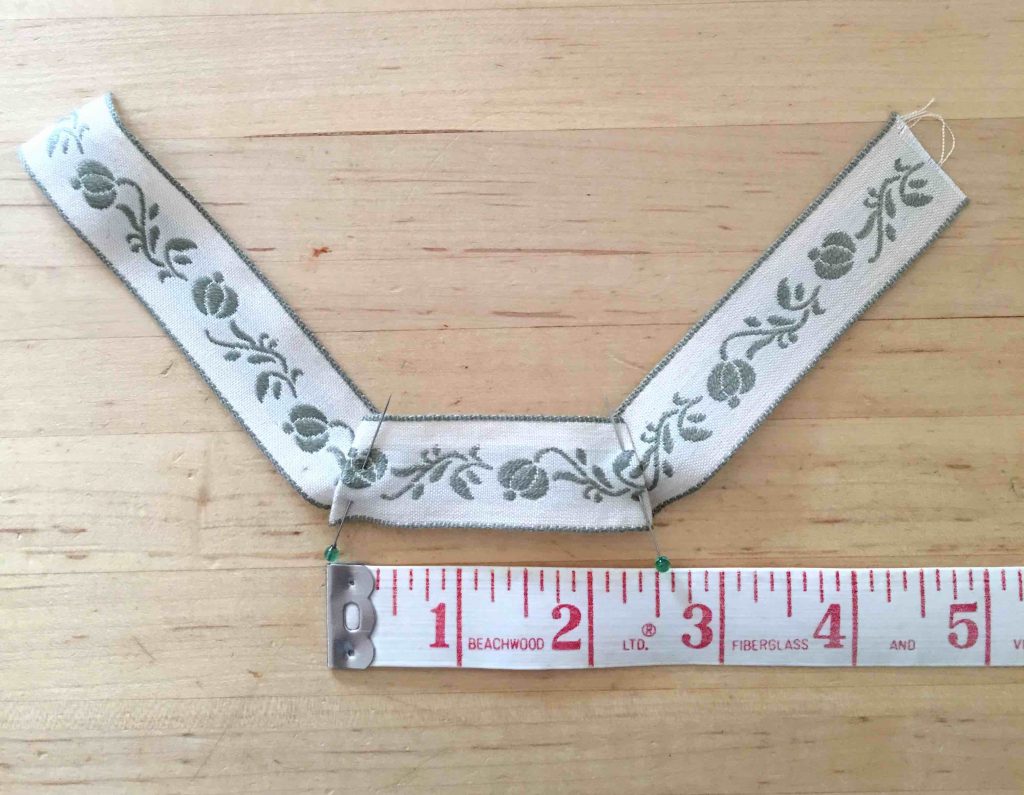
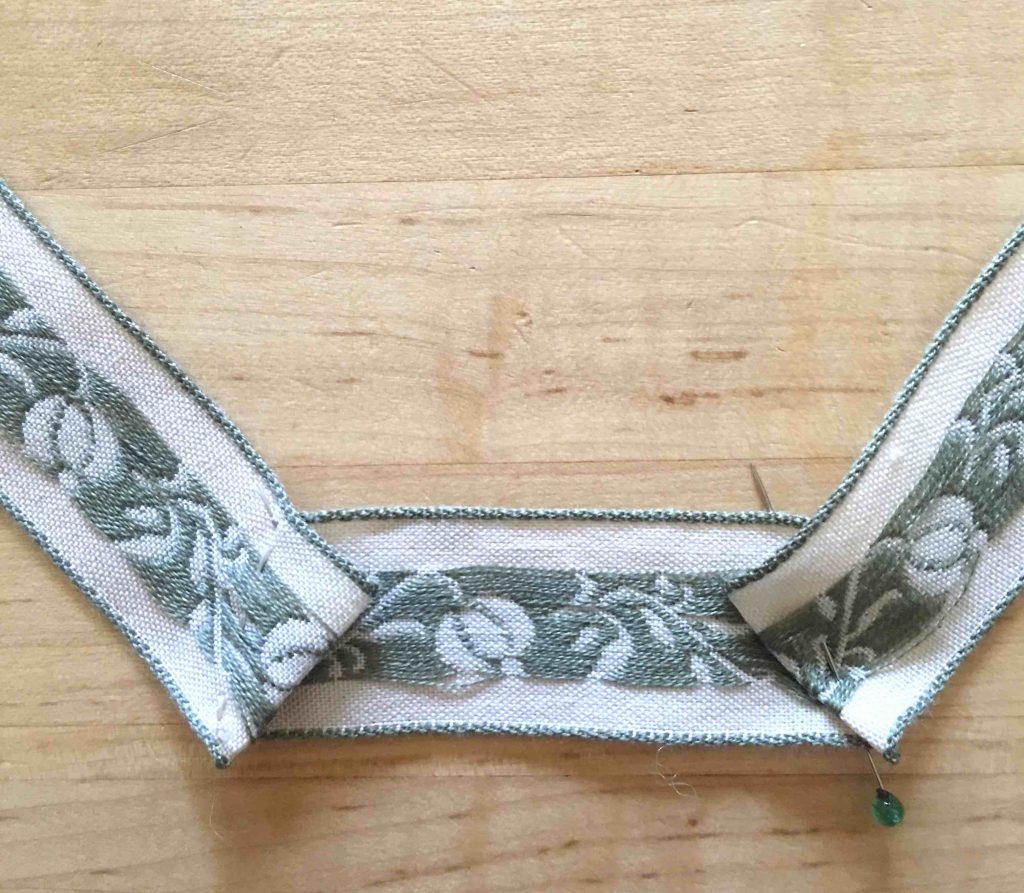
Step 4: Mark the center piece of your 11″ ribbon with a pin. Then mark a 2-1/2″ wide center section using center pin as guide and at each end of the center section fold under the ribbon as shown to angle up the ends of ribbon to create the sleeves. With matching color thread hand sew the folds in place.
Step 5: Place your romper on your doll. Pin your bodice center front to the top edge of your romper, centering in front. Bring the ribbon sleeves over the arms and pin to the back edges of the romper. Being careful of the pins remove romper and hand sew in place where you’ve pinned the ribbon. Sew a snap to back closure and you’re all set!
Wonderful ! Thank you