Phoebe and I have been watching back seasons of Project Runway. It’s been a very interesting experience. In general we don’t watch much (any?) reality tv. Oh, we watched Master Chef Jr! And Oscar and Phoebe both loved it, which was mildly irritating because they’re still such picky eaters. But the nice thing about that show, aimed at kids, about kids, was there was no drama or fighting. So far we’ve been lucky with Project Runway. I think we picked pretty tame seasons to start with and when the drama does come up we try to make it an opportunity to talk about conflicts. How they’re all very tired and stressed and how you have to watch what you say because it can be taken the wrong way. And then we talk about how the show edits what happens to make it seem like much more of a big deal than it is. Ha! Bet you feel sorry for my kids now don’t ya? Watching tv with us doesn’t sound like much fun! But really, we’re loving the show. Watching the creative process, all the sewing, all the cool fashion moments. And we’re casting our votes for best and worst. Super fun! Especially the really out there stuff, the unconventional materials challenges, the giant puffy dresses made out of greeting cards or parachutes. Phoebe’s 8 yo fashion taste is awesome. The bigger and “fancier” something is the more she loves it, very haute couture. So, anyhoo, all to get to what I’m doing today. I dragged up from the basement all my old notebooks full of pages I’d pulled from fashion magazines over the years. You know, before pinterest. I was thinking Phoebe might find it fun to look through them and find her favorites. And I might take some pics of some of my favorites and add them to my pinterest boards so I couldn’t see them more often than almost never.
It seemed like a silly thing to do, make another blanket/duvet/quilt item in the middle of Summer, but this is the Summer to do it! This thing has seen plenty of use already. I had 2 half yards of cute new Emily Isabella for Birch Organic fabric that had just arrived in the mail and I thought if only I could make something fast and not even put this in my stash. I cut it into 9″x9″ squares and cut out more squares of coordinating fabric and pieced it together on Phoebe’s new HK sewing machine sitting on my dining room table. I wanted it to be puffy so instead of using batting I bought a summer weight twin bed duvet at ikea for $12 and folde it in half to be the innards of this lap blanket. The backing is minkee from JoAnns. My kids paw all over it every time we’re at the store so I finally bought some. I “tied” it together by sewing poms through at the intersections. I meant it to be a sofa blanket sort of deal so I wasn’t too concerned about wear and tear. Although Oscar has taken it for his room so we’ll see how it holds up. Cute, fast, soft, pouffy and perfect for this rainy cool Summer.
Phoebe got a sewing machine for her 8th birthday last week. She's been sewing lots of practice swatches and made a cute little quilt for her doll. Today we made a book bag. We're headed over to the library to get her first library card so she decided she needed a pocket to hold her library card and that it should be a sun. Zippers as straps was a co-decision, mostly hers because she dug them out. The fabric choice though was all me. She is so impatient. She grabs the first thing she touches, yep, that's it. I had to steer her gently.
Are you hooked on sewing toys? Are you coveting expensive Japanese toy making books or have a pile of books in your Amazon cart that you’re dying to pull the trigger on? If you’re looking for a cheap fix for new patterns visit call number 759.642 at your public library.
Most likely your library has many soft toy making books to choose from. Only one caveat: they may be from 1945 or 1967 or 1983 and have projects like these…
But do not be discouraged! If you have some basic toymaking experience under your belt– if you know your way around a gusset, have sewn up a doll or two, have good stuffing techniques down and, most importantly, know what your soft toy tastes are– then you are ready to hunt down some real treasures from vintage sewing books.
I should put a little more about my caveat here before I get any further along; not all vintage sewing books are created equal, of course. Some are wonderful books, just dated, and then some are not great as well as dated. Everything I mention here is a matter of taste and opinion. I may think that clown face is creepy, you may think it’s cute! I may think the styling is outdated you may think it’s the bee’s knees. My crazy may be your awesome, so please take my opinions with a huge grain of salt and know I do not mean to be offensive.
Crazy or cute? You decide!
All that said, I think universally two of the biggest obstacles that will keep you from diving right into a project from a vintage sewing book are terrible photos and overwrought directions. We are spoiled. Photographs in books used to be an expensive luxury. The 1” black and white photo of a toy taken outside on a sunny day in a field of grass are not going to draw us in the same way the projects in books would today. Instead of photos you get pages and pages of directions. In paragraph style. With no bullets or numbers. And no diagrams. For a visual learner like me, it’s a nightmare. And the terminology can be different. Stuffing is kapok and seam allowances are turnings. So you have to be a detective. You’re going to have to read the pattern pieces.
Soft Toys by Delphine Davidson, c.1971
When reading the pattern pieces I’m evaluating their shape and design. Does it have gussets? Does it have darts? If so it will be more fully rendered, more 3-D. Can you envision its finished shape? Is it cute? What are its proportions like? One thing I know about my aesthetic is I go in for big heads on smaller bodies. I like that pop Japanese 60’s style much better than a more real to life look. So I think to myself, is that head too tiny? Often the answer is yes. One example was this guy below. But oh my what a happy accident. His head was supposed to be on another body from a pattern in this book but it didn’t turn out like the photo at all (which is how I came up with the proportions rule!). Tiny head on a big body = ack! So I realized the head was the same as this other pattern for “cuddly bear” that had a smaller body and I made up that body for my abandoned head. Holy cow, this guy is the CUTEST! He is the new favorite in our house. My daughter adopted him right away. He cracks me and my husband up because of his cute round tellytubby body (because of the darts!). Made up in super soft shaggy fleece from Joann’s, he’s definitely a cuddle doll!
Good Design in Soft Toys by Rudi de Sarigny, c. 1971
Here’s another pattern you wouldn’t pick from the photo, because there was none!– Just an illustration. But a look at the pattern pieces (above) show that it has a great vintage shape, a functional gusset and it should work OK. And it did! It turned out great!
You could make it up in a calico floral for a more 70’s look. I choose a geo print from my Japanese fabric stash. It’s canvas so firmly stuffed it has a great soft sculpture vibe. So cute for a nursery decoration.
Another reason you may pass by a pattern in a vintage book is the styling. The fabric, fur, details, etc. are unappealing. Put your rose colored glasses on and look beyond those to the shape. Is it a good shape? Then update that crazy long shag fur with a short pile faux fur or fleece and give it a go. Are the calicos giving you 80’s flashbacks? Then make it up in any of the amazing choices we have at the fabric stores today. And then remember the fabric stores of the 80’s (if you can) and be grateful! Are the facial features unappealing? Redraw them in your mind. Find a cute toy/doll online that you like and imagine it with that face. Cuter now? You bet!
The Woman’s Day Book of Soft Toys and Dolls by Joan Russell, c. 1963
I picked this next pattern, a doll, because I loved the pattern’s shape. She was sort of a cross between the two doll patterns available in my shop. What made me zoom past her the first couple times I looked through this book though were her facial features, her puckery understuffed face and her elaborate costumes. I thought: too much detail, too much work, not cute. But look how wrong I was. I love, love her!
I made the Pueblo Doll with a dress and a blanket poncho and moccassins. The pattern pieces for the clothes were simple and not fussy or intimidating. I opted for long braids instead of her buns and I love how she turned out.
Another drawback to making projects from a sewing book, vintage or not, can be resizing patterns. More effort is given in current toy books to offer full-sized patterns, but in most vintage books the patterns are laid out on a grid for resizing. I use the copier feature on my printer to resize patterns and then glue together the pieces. It’s not too bad but it is sort of a hassle. I thought this lion was pretty cute but I was feeling lazy so I came up with a brilliant plan to just keep it the size it was laid out in the book and make it a hand sewing project. I cut him out in felt and sewed his seams with a whipstitch. I liked the shape of this guy and the clever way he looks sideways at you.
The Woman’s Day Book of Soft Toys and Dolls by Joan Russell, c. 1963
Of the eight books I checked out from my library, four had projects that looked like they’d work for me and I only ended up using three, so it’s definitely hit or miss. But the search is great fun and I could not be more pleased with my results. If you find a pattern that works for you try others from that same book. And try not to be discouraged if a toy doesn’t turn out as you’d like. That will just make you a better pattern detective and that’s a skill that will help when sewing any toys, from new or vintage patterns. I’m inspired now to go back to the library and see what other books I may have missed!
It’s no secret that I’ve become a smitten kitten with Margaret Bloom‘s book on creating peg doll people. Making Peg Dolls, opened my eyes to a whole new world of cute and has kept Phoebe and I busy since Christmas. Margaret’s is one of those perfect books where I am completely happy making the projects exactly as they appear in the book. Her use wool felt along with the painted pegs is brilliant. The toys are adorable, not fussy, warm, the perfect play things. Every project I’ve tried has turned out so well and just could not be cuter.
Making Peg Dolls and More is just as excellent as the first book for both reasons, I want to make every project just as it’s done in the book and it also inspires me to dream up so many spin off ideas. I love all the creative ways the peg dolls come to life in the projects in this book. They fly and spin as tops and puppets. They have their own worlds in felt playmats with the toys tucked in like this pirate one is animated in her adorable book trailer. I am a sucker for little details and Margaret always delivers. Love the net wings and the little red vests on these fireflies.
The stuffed toys she brings into the story are perfectly done, like this dragon.
There are so many projects in this book that are perfect to make as gifts. I’ve bought the supplies for the cupcake toppers and the snuggly babies.
Phoebe needed some characters for a stop motion video project she is doing in STEAM Club at school and I thought, perfect! An excuse to make a new cast of peg people. I chose the Mermaids and Merman from Margaret’s book and the dolphin.
And couldn’t stop there and was inspired to make a stuffed whale with spout boy and a clam with a smiling pearl.
Thanks Margaret for asking me to be on your book tour! Here’s the rest of her blog tour…
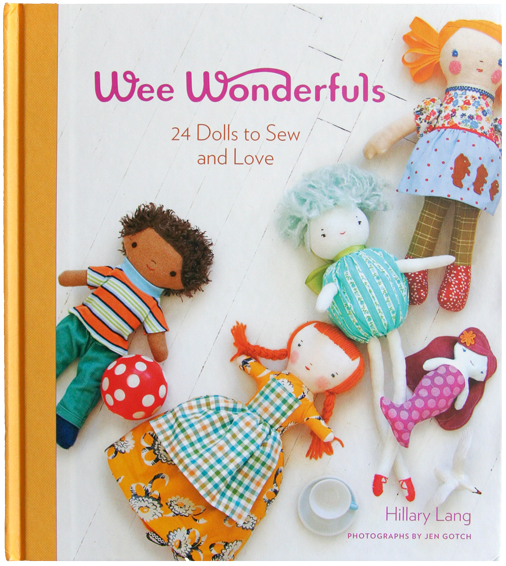
A captivating gang of 24 huggable, lovable creatures to sew—from classics like Margot, a topsy-turvy doll, and the button-jointed teddy bear Bjorn Bjornson, to irresistible Evelyn, a wool felt inchworm decked out in mod glasses and a kerchief, and Koji, a fiercely cute spiked softie monster. There’s something for everyone here—from kids to grown-ups and from beginning sewers to advanced dollmakers. Published by STC Craft, August, 2010.